Käytämme tällä sivulla evästeitä varmistaaksemme paremman ostokokemuksen. Sivustoa käyttämällä hyväksyt evästeiden käyttöehdot. Voit kieltäytyä evästeistä muuttamalla käyttämäsi laitteen selaimen asetuksia.


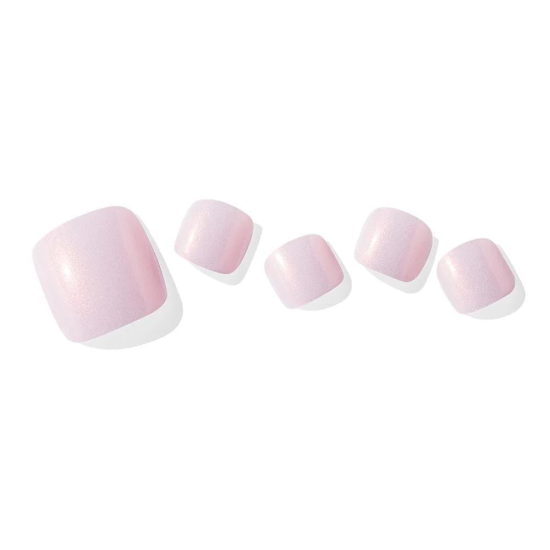
Ohora Semi Cured Gel Pedicure Strips (P Diamant)
 Vegan
Vegan Cruelty free
Key features:
• Made from 100% real liquid gel, not vinyl or plastic
• 60% cured - with its jelly-like texture, it allows for easy application and fits all nail sizes
• Lasts up to 14 days when fully cured under UV/LED-lamp
• Toxin-free and safety-certified products
• Vegan and cruelty-free
Experience the next generation of nail beauty with our semi-cured gel nail strips. Combining timeless style and long-lasting wear, they redefine your nail journey, offering a revolutionary approach to nail art and self-expression. These innovative gel nail strips combine the convenience of at-home application with the durability and longevity of professional salon-quality nails, while being user-friendly for all, even beginners.
Semi-cured gel nail strips – your all-in-one solution for achieving a salon-quality manicure or pedicure at home. Inside the kit, you'll find user-friendly flexible gel nail strips, all in 15 different sizes. In addition, the kit includes 2 prep pads, 1 nail file, and 1 orangewood stick to ensure a smooth experience and make your nails look their best. Thanks to their waterproof top gel layer, these nail strips can endure daily activities and last for up to 2 weeks when fully cured under a UV/LED-lamp. Indulge in beautiful nails and showcase your individual style.
Perfect fit for every nail shape – our gel nail strips, which are 60% cured in advance, are carefully crafted with precision to ensure a perfect fit for all types of nail sizes and shapes. Whether your nails are round or square, you can trust that our gel nail strips will look absolutely fabulous on you.
Vegan and animal-friendly – we care about the planet and our furry friends. That's why our gel nail strips are 100% vegan and cruelty free. They are never tested on animals, contain no animal-derived ingredients, and are free from harsh chemicals. So you can enjoy the beauty of your nails with a clear conscience.
How to use:
These directions can be applied to both a manicure and pedicure.
Step 1 – Prep Your Nails:
• Begin by thoroughly washing your hands to remove any oils, creams, or moisture. Sweat, oils, creams, and any other moisture present on your natural nails will reduce gel nail strip adhesion.
• Remove any old polish and gently push back your cuticles. You can also buff the surface of your nails slightly to create a smoother base.
• Use the provided prep pad to wipe your nails clean, ensuring they are completely dry. This step is crucial for proper gel nail strip adhesion.
• Optional: for this step, you may use Ohora Pro Nail Primer Plus to smooth out flaws, minimize nail damage, and enhance the adhesion and longevity of Ohora gel nail strips.
Step 2 – Apply The Nail Strips:
• Select a gel nail strip that matches the size of your natural nail and gently peel it off from the transparent film using your fingers.
• Check for markings on the strip to determine which side should face your cuticle and which should be at the free edge.
• Apply the gel nail strip to your nail, making sure it covers the entire nail surface, while leaving a small gap between the strip and your cuticle. If you see that one of the gel nail strips doesn't fit your nail properly, you can gently stretch it before application. However, it's important to be cautious not to stretch it too much, as this could distort the design or cause it to tear.
• Press down and smooth the gel nail strip firmly onto your nail, beginning from the center and moving toward the edges, paying extra attention to the free edge. This helps prevent snagging and extends the life of your manicure or pedicure.
• Optional: for this step, you may use the rubberized side of the Ohora Pro Easy Dual Stick to gently smooth down and secure gel nail strips to your natural nail, ensuring a perfect application every time before curing them under the UV/LED-lamp.
Step 3 – Trim And Shape:
• Use the included nail file to file away any excess or leftover gel nail strips. File in a downward motion and in one direction to minimize damage and peeling.
• To ensure a clean finish, again use the wooden nail stick to smooth the strip along the edges and sides of your nail.
You can also remove excess of the gel nail strip using this method:
• If needed, clip off excess nail strips with nail clippers or scissors, but avoid cutting too close to the free edge as small amounts of the gel nail strip can be filed off easily after curing.
Step 4 – Cure Your Gel Nail Strips:
• Place your nails under the Ohora UV/LED-lamp for curing. The curing time may vary depending on the design. Designs with thicker gel, nail gems, or nail decals may require longer curing times.
• Check to ensure that your gel nail strips have completely cured. You'll know they're ready when the gel has hardened and sealed onto the nail. In addition, complete curing enhances the gloss and durability of the nail strips.
• To finish, use the included nail file once more to smooth the edges and achieve the desired look for your gel nails.
Step 5 – Apply The Ohora Pro Glossy Top Gel (Optional):
• After applying the semi-cured gel nail strips and curing them under a gel lamp, you may also apply a high-gloss gel top coat. This top coat adds a professional shine and provides diamond-strength protection to your gel manicure or pedicure.
• Cure the top coat under the UV/LED-lamp.
• This top coat has a non-tacky formula and does not require wiping of the sticky layer with extra remover.
Step 6 – Final Touch:
• Once the topcoat or semi-cured gel nail strips are dry, you can apply cuticle oil or moisturizer to hydrate your cuticles and maintain the health and appearance of your nails.
How-to guide for removing gel nail strips.
Gel nail strips can be effortlessly removed using Ohora Pro Easy Peel Remover. This non-drying solution is specially formulated to effectively remove gel nail strips. It contains active ingredients that are tough on gel while remaining gentle on your nails.
In addition, there is a handy tool named the Ohora Pro Easy Dual Stick, which you can use with the remover to remove gel nail strips. Apply 1-2 drops of Ohora Pro Easy Peel Remover on the gel nail strips before using the tool. Use the tool with the logo facing upward and gently lift the edge of the nail strip and detach it from the natural nail. Applying a few more drops of Ohora Pro Easy Peel Remover into the gap between the gel nail strip and the natural nail eases the removal of the gel nail strips.
Be careful to use the stick in the proper direction, as using it with the logo facing down may cause damage to the nail or toenail.
If you do not have Ohora Pro Easy Peel Remover, then here's a step-by-step guide on how to do this safely without it:
Materials You'll Need:
• Acetone-based nail polish remover
• Cotton balls or pads
• Aluminum foil
• Wooden cuticle stick or orangewood stick
• Nail buffer or file
• Cuticle oil or moisturizer
Step 1 - Gently Buff the Top Layer:
• Start by using a nail file or buffer to gently remove the top shiny layer. Do not use force. This helps the acetone penetrate more effectively.
Step 2 - Soak the Cotton in Acetone:
• Soak cotton balls or pads in an acetone-based nail polish remover.
Step 3 - Place the Cotton on the Nails:
• Place the soaked cotton pieces on top of your nails. Make sure they cover the entire nail surface.
Step 4 - Wrap in Aluminum Foil:
• Wrap each finger with the soaked cotton in aluminum foil. This helps keep the acetone in contact with the nails, allowing it to soften and dissolve the gel.
Step 5 - Soak and Wait:
• Wait for about 10-15 minutes to allow the acetone to break down the gel. During this time, you can relax or do other activities.
Step 6 - Gently Remove Wraps:
• After the waiting period, one by one, remove the aluminum foil wraps and cotton balls. You'll notice that the gel has softened and lifted from the nail surface.
Step 7 - Scrape Off Gel:
• Use a wooden cuticle stick or orangewood stick to gently scrape off the softened gel. Be very gentle in order to avoid damaging your natural nails. If some gel remains, you can repeat the soaking process for a few more minutes.
Step 8 - Final Clean-Up:
• Once all the gel is removed, wash your hands to remove any remaining acetone or gel residue. You can also use a nail buffer to smoothen the nail surface.
Step 9 - Nail Care:
• After removing the gel, it's important to rehydrate your nails. Apply cuticle oil or moisturizer to your cuticles and nails to replenish moisture and keep them healthy.